Tuesday, July 31, 2012

Inside Pictures III - July 31, 2012

    The top picture shows the northeast corner of the loft. This will be a bedroom with a full closet. Both loft bedrooms will have a 4 foot by 4 foot window on the end wall, as well as a 5 foot by 5 foot window in the dormer. These windows will provide excellent ventilation and natural light. You can also see the lights of Butte through the dormer windows at night.


    The last picture shows the southeast corner of the loft, where the second loft bedroom will be located. This one will also have a full closet.


Inside Pictures II - July 31, 2012

    The top picture shows the southeast corner of the main floor. This will be the master bedroom. To the left of the bed behind the lamp your can see the fourth door frame. This is also a double door, which will be installed when the interior is started. You can see that I have some carpet on the floor now. Eventually, the entire main floor will be hardwood. Possibly tile in the master bathroom!


    The second picture is the first of the showing the loft. I store my lumber here now; when the house is completed, this will either be an area for a pool table, or a sitting and play area for grandchildren.


Inside Pictures I - July 31, 2012

    I was asked yesterday if I could post some pictures of the inside of the house. I haven't really done much to it yet, but here goes!

    The first picture shows the northeast corner of the main floor. The is where we will put a half bath, the mud room and the washer and dryer. you can see on the right there is a door frame. The door will be installed when I begin the interior.


    The second picture shows the northwest corner of the main floor. This will be the Dining Area/Kitchen. The window on the right will be over the kitchen sink. The door frame in the background is where the second of four doors will be installed when we begin the interior.


    The third picture shows the southwest corner of the main floor. This will be the family room. In the corner will be a stone fireplace. Above this area the ceiling goes right up to the purlin and ridgepole logs. (About 27 feet up) The white door in the background will be replaced with a much nicer door.


Erosion Control - July 30, 2012

    Yesterday I took a good look at the condition of the culvert at the end of the driveway. last year I had to shovel out a lot of silt that was threatening to plug the culvert. I put piles of small rocks in the ditch on the side of the driveway to stop the silt from coming down to the culvert. Not so good!

    It appears there is still a small amount of flow going through the culvert, so I shoveled some more silt out, hauled a load of larger rocks from Melrose, and built a series of about 18 rock dams in the driveway ditch. Hopefully, this will stop the majority of the silt from coming down the ditch, and allow the cleaner water to wash out the culvert. If it is not washed out by next spring, I will get my cousin and his backhoe, and we will completely redo the culvert setup.


Garage Progress - July 27, 2012

    I have completed all of the garage I can for 2012. I am down to two logs left and they are different sizes so I cannot match them to the walls. One of the first things I will do in 2013 will be to cut more logs, haul them in and peel them. I plan to finish the garage next year, then begin working on the interior of the house.

    I had to do quite a bit of caulking to seal cracks on the garage logs. I feel the cracks were due to the logs laying out in the elements for two years. Even with the logs stained, there were more cracks than I saw in the house logs. This will be cured when I cut fresh logs next year.


    This picture just shows the garage in relation to the house. You can see the two logs I have left in the foreground.


Railing Completed - July 30. 2012


    Yesterday we finished staining the deck railing. I also clear coated the facia boards on the sides of the house where the rain runs off the roof for added protection from the elements. I was going to stain the facia boards on the front of the house too, but the wind came up and the stain can blow around as it is applied.

Log House Update - July 31, 2012

    I have been very lax with postings to this Blog so I am catching up tonight.

    I had a question asked about what a "Chinkless Fit" was. In a typical log cabin, the logs were notched on each end and there was space between the logs the entire length, this space was "Chinked" with mud, moss, cement, etc. The chinking could be from 2 inches to 5 inches wide. The top picture here shows a corner of the house. I use a product called "Log Jam" to put a bead of caulk about 3/8 inches wide to cover the seam between the logs.


    In the bottom picture, you can see what the seams look like before I apply the "Log Jam". If I am doing a great job scribing the logs and cutting them to shape with the chain saw, you would not be able to get a credit card between the two logs. I have some this close, but not all. The difference in color between the two pictures is one was in direct sunlight, the other was in the shade.


Wednesday, July 18, 2012

Garage Progress - July 18, 2012


    Yesterday I was in the mountains on horseback moving cattle. I'll be back there next Monday to help move them further into the upper pastures. Today I finished the last log on the third round and installed the first log of round four. You can see on the left side of the picture there is a split log on the wall. This will be a window on the south side. It will be 5 feet wide by 4 feet high. There will be two windows on the west side and two on the north side. These four will be 4 feet by 4 feet. I wasn't going to put windows on the north side, but they are good for cross ventilation on hot days. All the windows will be started on this round of logs. This fourth round will bring the walls very close to 5 feet high.

    Anytime I have a split log on the wall (A log unsupported by a corner.) and I start building up on it, by the time I get the third or fourth log installed, the wind here will actually start moving the log wall section back and forth. The shorter the wall section (Width), the worse it gets. When I was doing the house, I screwed 2 X 4's to the decking and then to the wall sections to control the movement until I could cap them with a full length log going from corner to corner. The garage deck (Floor) is cement! This leaves me with a decision to make this year.

    On the right side of the picture you can see the short wall section between the two garage doors. This section is 43 inches wide. I have already decided I will not install any more logs on top of this section until I am ready to run a full length log over the garage doors. I am cutting the 43 inch logs to length and numbering them. When I get ready to put in the top log, I can build this section up in a day, then secure it to the full length log. I will still have to secure the wall to prevent movement, but I will go with a 2 X 4s on a turnbuckle and secure them to the ground with steel pegs.

    I will probably not install more that five or possibly six rounds of logs on the garage this year. With just the windows, I will have three more unsupported log sections. I don't want to have to install any wall supports and leave them up over the winter. there are too many things that could go wrong.

Thursday, July 12, 2012

Building again, Garage Progress - July 12, 2012

    My wife, Betsy was here for eight days so I did not do any building. We did  lot of things together. This is a picture of the sunrise we saw one morning as we were heading to Elk Park, just north of Butte to look for elk. We saw over 80 cows and calves feeding in the meadows.


    The next picture shows my garage progress. I started installing the third round of logs today. I'm using very large logs for this round. The big end is close to 17 inches on the one I've already installed. I have a couple more I need to work in that are close to 20 inches in diameter. When you use big logs, there is a lot of cutting required with the chainsaw, but you add height to the wall very quickly. Starting out with a 2 foot stub wall helps too!

    I haven't measured it out yet, but it appears I will start the windows after this round. I have enough logs on site for about three more rounds.


Wednesday, June 27, 2012

Garage Progress - June 27, 2012


    Today I split a log down the middle to make the first two sill logs. (First picture) I then sawed a slab off the sides of two more logs to make the other two sill logs. I forgot how dusty it gets when you are ripping logs like this. Once I ripped them, I applied an oil based stain to the flat side for protection from moisture. I chalk lined down the middle of the cut face on all the logs so I could set up and drill holes for the J-bolts that were placed in the cement stub walls. When I drilled the holes I had to make sure they were as perfectly straight as possible. If they are crooked, you cannot get the threaded rod to thread into the connector nut on the J-bolts. Some of the logs ended up being 9 inches thick.


    The bottom picture shows the first round of logs installed on the walls. They are not bolted down yet as I do not have all of the connector nuts. I realized on Monday that I should have ordered them as soon as I came to Montana this spring. I'll go to Butte in the morning and pick them up. They are supposed to be in  tomorrow. The next round of logs will go much quicker. The difficulty will be in choosing which four logs will match up for the next round.


Tuesday, June 26, 2012

Starting Garage - June 26, 2012


    Today I started building the garage. I cut and installed all the 2 X 8 treated sill plates with sill seal between them and the cement stub walls. I was planning to set up and cut the first sill log in half but the wind is blowing so hard right now that I cannot measure the logs or set up the string line. I will hit it the first thing i the morning when it is usually calm. Once I get the sill logs cut, the wind will not bother the building process. (Unless I get blown off a ladder when the walls get high.)

    My cousin, Jim and I hauled the forklift out last evening so I can move the logs around.


Friday, June 22, 2012

Deck Rail Building Completed - June 22, 2012

All the deck railing has been installed. Staining will be the final process in a month or so. Now I will begin on the garage. I have scheduled time with my cousin to transport the lift to our property. On Monday I will pick up the rest of the materials needed to begin laying the sill plates and the sill logs. It's time to break out the big chainsaw to split the sill log in half.


Thursday, June 21, 2012

Railing Progress - June 21, 2012


    This morning I peeled the remaining four rails that I cut last night. I also peeled and stained the last 46 spindles. Once they were dry, I assembled and installed the 13th section of railing. Tomorrow I will complete the last two sections, then I'll start on the garage.

    I'll have to put together a list of what I need to get. I'll need about 110 feet of treated 2 X 8s for the sill plate. The wall logs will rest on them. I'll need more sill seal to go between the sill plate and the 2 foot cement wall. I'll need treaded rod, connector nuts and sill plate washers to bolt down the first round of logs.

    Splitting the first log in half and getting the first round of logs on the wall will be time consuming, then the job should go much faster. Before I know it I'll be back in the mountains cutting more logs!

Railing Progress - June 20. 2012


    On Wednesday I finished the 12th section of railing. I ran out of peeled and stained spindles, and I still needed four rails to finish the last two sections. I decided it was time to head for the mountains and get the rest of the rails. I decided I needed to be more critical when I chose the trees to cut down. One rail was so crooked (I had already peeled it) that I tossed it aside. When I was picking the trees to cut this time, I was just about laying on the ground looking up the trunk to see how straight they were. This worked great. I cut 6 trees and cut them into 10 foot lengths so I came out with 12 good straight rails. I have enough for the loft. Coming out of the mountains was very interesting!


     I saw four bull elk crossing the road in front of me before I had even traveled three quarters of a mile. (It is eight miles of dirt road to get back out) About two miles later I spotted the bull elk in the picture below. He watched me as I sat watching him for a couple of minutes, then he took off up the side of the road. There was another bull with him. About a mile and a half before I hit the tar road again, three cow elk crossed the road in front of me. The ride was better than going through Yellowstone park!!!!


Tuesday, June 19, 2012

Railing Progress - June 19, 2012

    I finished 4 more railing sections. I have enough material to finish 4 more tomorrow, then it's off to the mountains on Thursday. When I walked off the porch this morning there was an antelope about 75 yards north of the house. She just looked at me as I walked to the basement. There was a lot of wind today. I think summer is actually on the way soon!


Monday, June 18, 2012

Railing Progress - June 18, 2012

 
    Today I finished four more sections of railing. I made a few mistakes but overall it went much better than I expected. I am going to try getting all the railing installed this week. That will include a trip into the mountains to get the last three rails, and to Helena to get the last spindles.

    I just returned the weed sprayer to my neighbor, David, and he informed me we are supposed to get snow tonight. If we do, I will post a snow picture tomorrow.

Wednesday, June 13, 2012

Peeling and Staining Spindles. June 13, 2012


    Between yesterday and today I peeled and stained 168 spindles. (There are 92 completed spindles lined up on the logs in the picture) With the 45 I completed earlier, I'll need at least another 41 to complete the deck railing. The 2 X 4's mounted on a piece of OSB you see in front of the spindles is a rack I built to hold the spindles while I peeled them. The ground underneath the rack looks like a big bird's nest with all the wood shavings spread around my work area.

    I had to go into Butte today to get weed spray. The weeds are in bloom around the building site and on the side of the driveway. If I don't spray them soon, I will have a bumper crop next year!

    Tomorrow I plan to spray the weeds first thing in the morning if the wind is not to strong, then I will begin building more railing sections and mounting them to the deck.

Monday, June 11, 2012

First Deck Rail Section Installed. June 11th, 2012

Today I started building the first section of deck rail. I built a template out of a 2X4 so the spindle holes would all be drilled on the same plane and evenly spaced. I hand peeled and stained about 45 spindles today. (Only 220 to go!) The first section took 16. I stained the bottom and about a foot up on all 30 posts.


Here is the first completed rail section. I drilled two 3/8" holes on each post, and using an electric impact wrench installed 4 - 3/8" X 8" lag bolts with fender washers. They are installed towards the outside of the rail. Tomorrow I will hand peel and stain the rest of the spindles. I had planned to build the sections on the garage slab. The first one was completed on the deck and it seems to be the best way to do it. I will finish staining the rest of the posts and the rails once all the sections are in place.


Friday, June 8, 2012

Deck Railing Progress - June 8th, 2012

   Yesterday I finished peeling all the deck railing posts and all but three of the rails. The poles I cut last week looked straighter in the mountains that they do on the peeling rack. I will have to go back for a few more rails. I scribed and carved out each post so they fit tight to the vertical log supports. Each post is labeled with its position on the deck.


    The second picture shows the final fit. I ran a double string line along each side of the deck to help position the posts in relation to the vertical logs. I spaced each post 1/4 inch above the decking so water on the deck cannot wick up into the posts causing damage. I also made sure that each post was as close to vertical as possible. This will make the top and bottom rails in each section the same length, and the spindles will have uniform gaps at both ends on each section.


    The next step is to strap the two posts for each section in place and determine the rail length for that section. I will then pick out the rails, cut them to length, and determine where the two holes should be drilled for the bottom rail. These holes I will drill while the posts are strapped to the log supports. Once the spindles are installed in both upper and lower rails, I will be able to determine where the top holes should be drilled.

    The weather forecast for the next two days is a high of 52 and rain. I'm looking forward to summer!


Monday, June 4, 2012

Peeling Deck Rails and Posts June 4th, 2012

      Today I finally started peeling the poles for the deck posts and rails. I forgot how much fun this part was. I managed to peel and cut to length 23 posts and 8 rails. (Stacked in my trailer) I need 30 of each to complete the deck. I have enough poles to supply the rails for the loft, so I will probably peel those while I am at it. (If I don't expire first) You can see the poles I have to peel on the peeling rack in the background.


     I received a call today from the Butte Silver Bow Courthouse. They have my garage building permit approved. I will pick it up tomorrow.

    I woke up this morning to a downpour. It was very loud as it hit the roof.

    Tree swallows were starting to build a nest in one of the can lights over the deck. The bulb was off center allowing them room to get behind it. I put up another bird house on the deck post and centered all the bulbs over both sides of the deck. The birds have already moved into the birdhouse. They've got my number! They mess with the house and I make them a birdhouse!!!


Basement Wiring MAY 31ST, 2012

After stumbling around the basement at night trying to find the bathroom light switch I decided to wire most of the basement. The first photo shows the exterior lights and one of the two exterior outlets I installed.


This picture shows two of the three can lights I installed inside the basement. I also installed three outlets on the inside wall under the windows. What a difference! I probably should have done this last year like I planned.


Wednesday, May 30, 2012

First pole for 2012

I am back in Montana for a summer of building. The first thing I did was apply for a building permit for the garage. It is under review by the planning committee. I should hear back by next week.
I applied for an extension on my electrical wiring permit. I probably won't finish the wiring for a couple of years. I visited the USDA Forest Service in Butte and applied for a pole permit to cut poles for the deck railing. They told me a couple of places to look, and when I find what I want, to come back and get the permit. I went in the mountains today an cut all the poles I should need for the deck. Here I am below dragging the first log out. Three elk ran in front of us as we were coming out of the mountains today.


I also bought electrical supplies to wire in lights in the basement interior and on the outside of the basement. 

Tomorrow I will start peeling logs for the rails and the posts. I found a place up by Helena, MT that makes peeled and shaped spindles out of the same poles (Just smaller diameter) I cut for the rails and posts. I will just have to hand peel the spindles so they match the look of the rails and posts. This will save me a lot of time this year. 

Some of the poles I cut today were dead so I can stain them before installing them. The ones that were still alive will have to dry until August or so before they will take the stain.  

It appears there are 11 antelope who think they own the property now. The snort at me every morning when I walk outside. Monday morning I woke up and saw one walk right past my car and around to the north side of the house.

Monday, April 30, 2012

Practicing in New Hampshire


It was time to start limbering up for the summer. On Saturday, my wife Betsy and I stripped two layers of shingles, a layer of 5/8" plywood and most of a layer of 3/4" shiplap boards off the roof of our screened porch in New Hampshire. We stripped off all of the screen around the porch and the boards that held the screens in place.  It came to 2760 pounds of debris when we took it to the dump in the afternoon. When we finished unloading it I thought I was going to die. I've been living way to easy this winter!!! We thought the roof was leaking around the two skylights which we removed, but it turns out there were leaks in the shingles in quite a few places as well. (Not anymore!)


 On Sunday, I hired a friend, Andrew, to help put the roof back on. We replaced all of the weak and rotten boards and all but two of the 4 X 8 sheets of plywood, then put down ice dam, 30 pound tar paper, and drip edge. The actual shingling, except for lifting the plywood sheets and shingles onto the roof, was the easy part. I have a couple of pieces of siding over the flashing, and some upright siding in the corner of the roof to replace, which I will do this week. We'll replace the screening this weekend. The house painters should start pressure washing and painting the house in the next week or so.


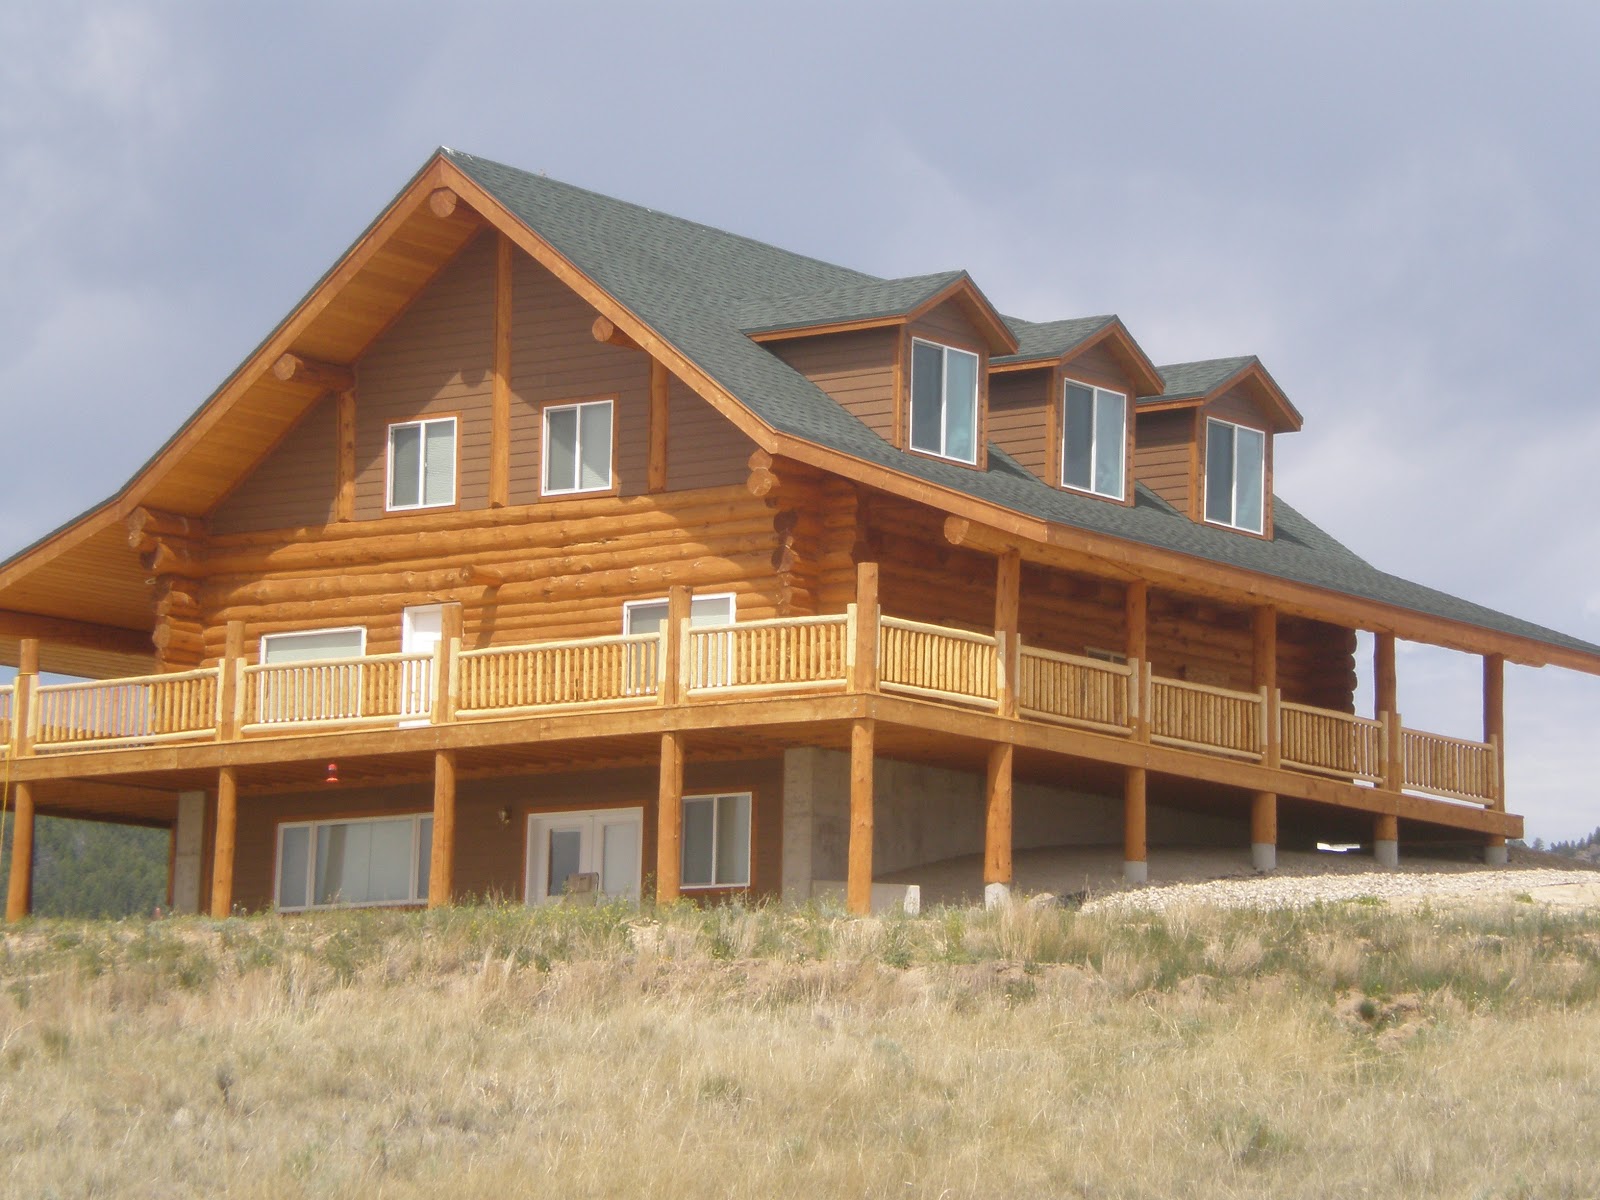
I gave my two month's notice about 6 weeks ago at the company where I have been working this winter. It is about time to for me to get all my gear together and get ready to head to Montana in two weeks. Betsy and I have been walking a couple of miles every day this winter, but the activities this weekend let me know I need to get more serious about exercise before I resume building in Montana!


My next posting will be around the 1st of June when I have been able to accomplish something wothwhile in the Big Sky Country. If anyone reading this Blog would like to to hear more about any Log Home Building topic that I may not be covering in as much detail as you like, please let me know. If there are comments addressed to me about these topics, I will gladly respond.

Thank you,
Doug A