Tuesday, August 31, 2010

House dried in 100%, Aug 31, 2010

Here are pictures of all sides of the house. All windows and doors are either installed or sheeted over for the winter. The only thing I have left to do is cover the two chimney flashings in the roof. I also have to do something about the water running off the roof making a ditch on both sides of the house. I would like to sheet the ground under the deck on both sides of the house out just past the edge of the roof and cover it with stones to prevent the soil from washing away and stop weeds from growing under the deck.


Monday, August 30, 2010

Finished installing windows available, Aug 30, 2010


Today I finished installing all the windows I have purchased so far. There are 4 windows in the loft and 2 windows on the main floor that are not available at this time. These are the windows on the west side of the house in the family room. Below are the windows on the North side of the house. I am in the process of framing in the center window. I will sheet it over with OSB for the winter. When I get the window next year, I can install it very quickly. I will finish this window tomorrow. There is one other window I will frame out and sheet over tomorrow.


There are 4 doors on the main floor, 2 double doors and 2 single doors. I have installed one of the single doors. Since I do not have the other doors at this time, I
will do temporary frames on them and sheet them over with OSB for the winter.

I will be spending the next few days wrapping up loose ends. I plan to head home by September 6th at the latest.

Friday, August 27, 2010

View of loft from the main floor, Aug 27, 2010

Here are pictures of the loft from the main floor. The top picture is the north end, the bottom the south end. As you can see, all of the logs for the roof system have been stained completely. Here you can see the four windows that were framed in and sheeted over. When I get the windows next year, I will use a router to remove the OSB covering the window openings and install the windows.

These windows will require the use of the fork lift. Three of these windows will be sliders for ventilation. The window directly over the family room could be a picture window or a slider. I will have to look at how easy it can be accessed before I make the decision.

Installing windows And doors, Aug 27, 2010

Today I started installing windows and doors. The first windows I installed were the three 5' by 5' sliders in the dormers. It was a quite windy today so it was a little challenging getting them in place by myself. I used the lift to get them on the roof.
I installed one door on the main floor and a 6 ft by 4 ft picture window in the family room. I made a mistake and did not allow for the 2" X 6" frame on the top and bottom of the window, so I had to cut the top flat twice. You would not believe the amount of sawdust the chainsaw throws out when you do a rip cut.

When I bought the windows, they only had 2 - 4' X 4' windows, which is just what I needed for the main floor. The 4 - 4' X 4' windows that I sheeted over in the gables will have to be completed next year. The dealer said they would not be in until the end of the year.

I also need a 4' X 3' window, and a 4' X 3.5' window for the main floor. They were out of stock on these also, so I will frame these windows out with 2 X 6s and sheet them over with OSB for the winter. Next year I will install them when I install the windows in the gables.

I will probably be framing out the last 3 doors on the main floor and sheeting them over with OSB for the winter. At this point, the house will be completely dried in.

Wednesday, August 25, 2010

End gables sheeted & wrapped, Aug 25, 2010

Today I finished sheeting in the end gables and covering them in house wrap. I sheeted over the windows on both ends for the winter. Next year I will cut back the house wrap over the windows, and router the windows out. I ran out of white Tyvek, so I had to use some blue to finish. It makes it look like the house is winking!

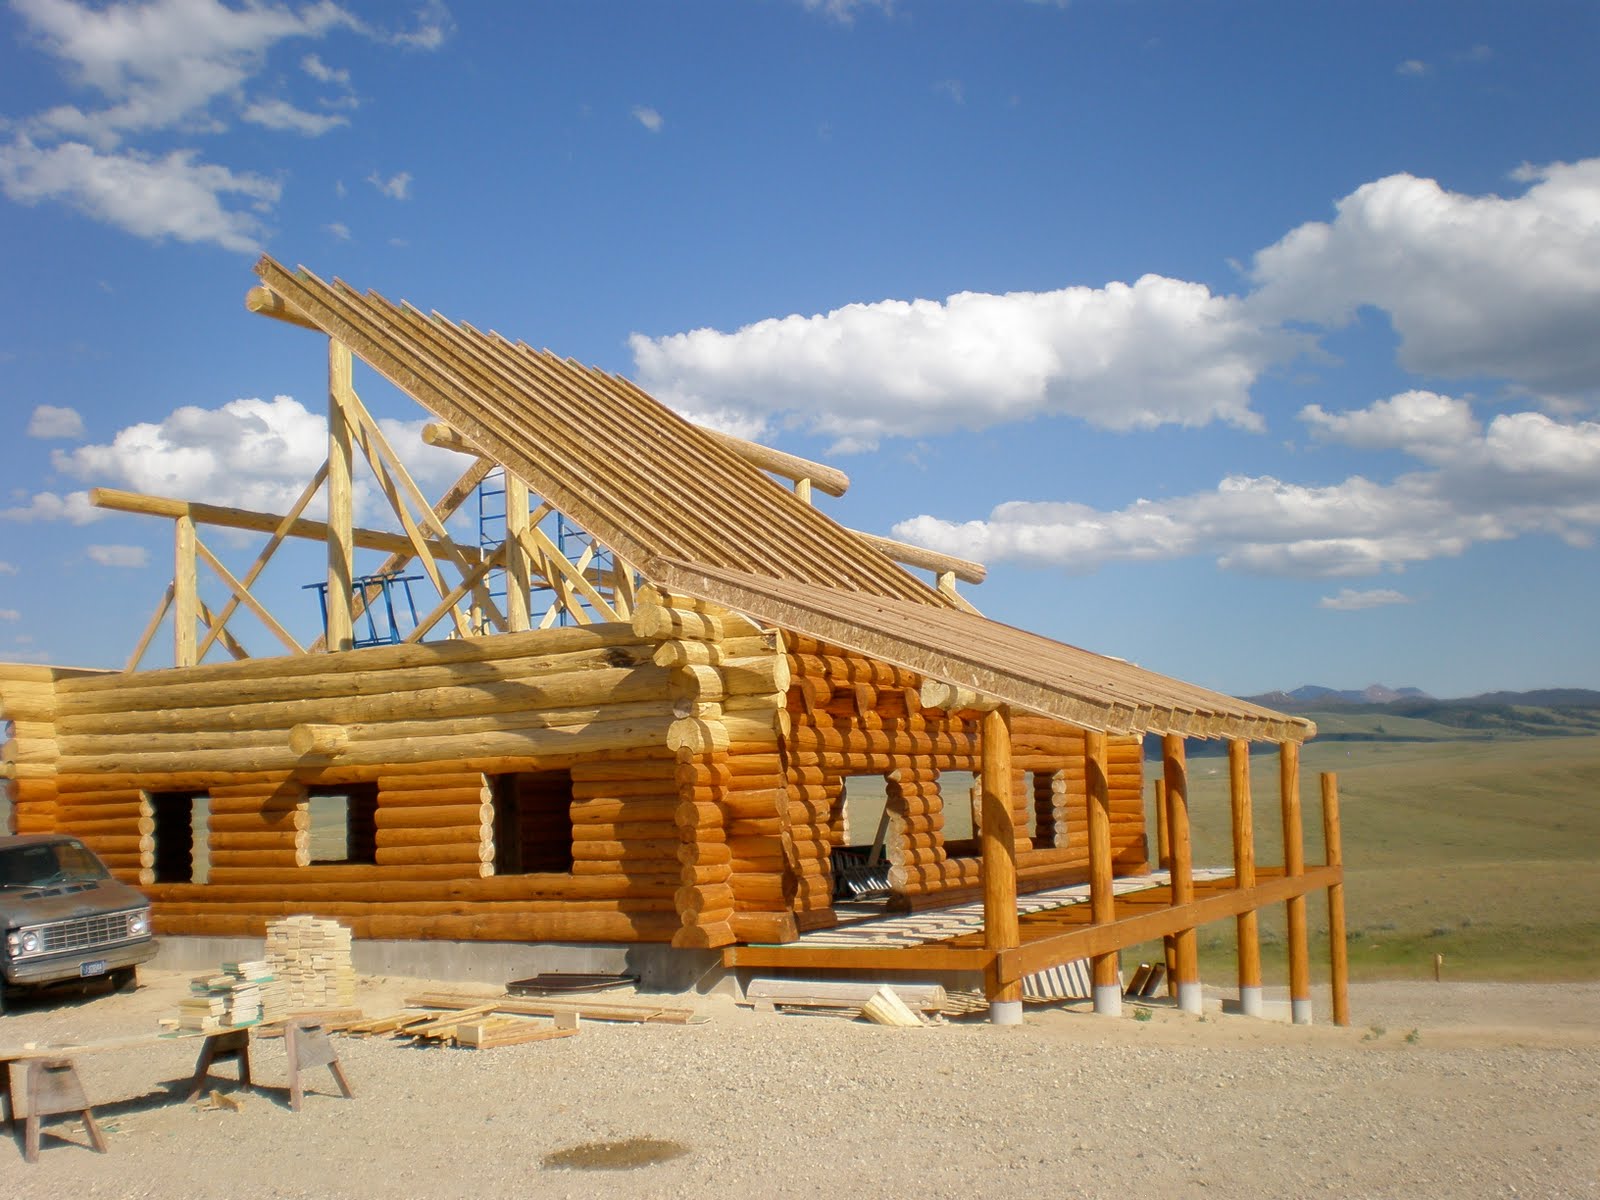
Tomorrow I will finish staining the last half of the ridgepole, the last half of the west side purlin, and three of the upright logs supporting the roof system. With these completed, the only staining left on the house is the 2 inch strip on the underside of the facia boards. This has to be completed before I install the soffit boards. Since I won't install any soffit boards this year, it can wait for next year.

Once I have completed the inside staining I will dismantle all the scaffolding, load them on two trailers, and return them to Al Anderson and Paul Talon.

I have a load of 15 sheets of OSB being delivered tomorrow to sheet over the main floor doors and windows. I will cut them so I can use them on the garage roof next year. I will send back 14 sheets of 7/16" OSB, 6 - 24' TGIs and 8 -2 X 6 X 16' with the driver for credit. This will clean up all my building supplies on site for the year.

I have one 3' exterior door that I purchased last year that I will install on the main floor on the north east corner of the house. This will give me access to the house, yet allow it to be locked up for the winter.
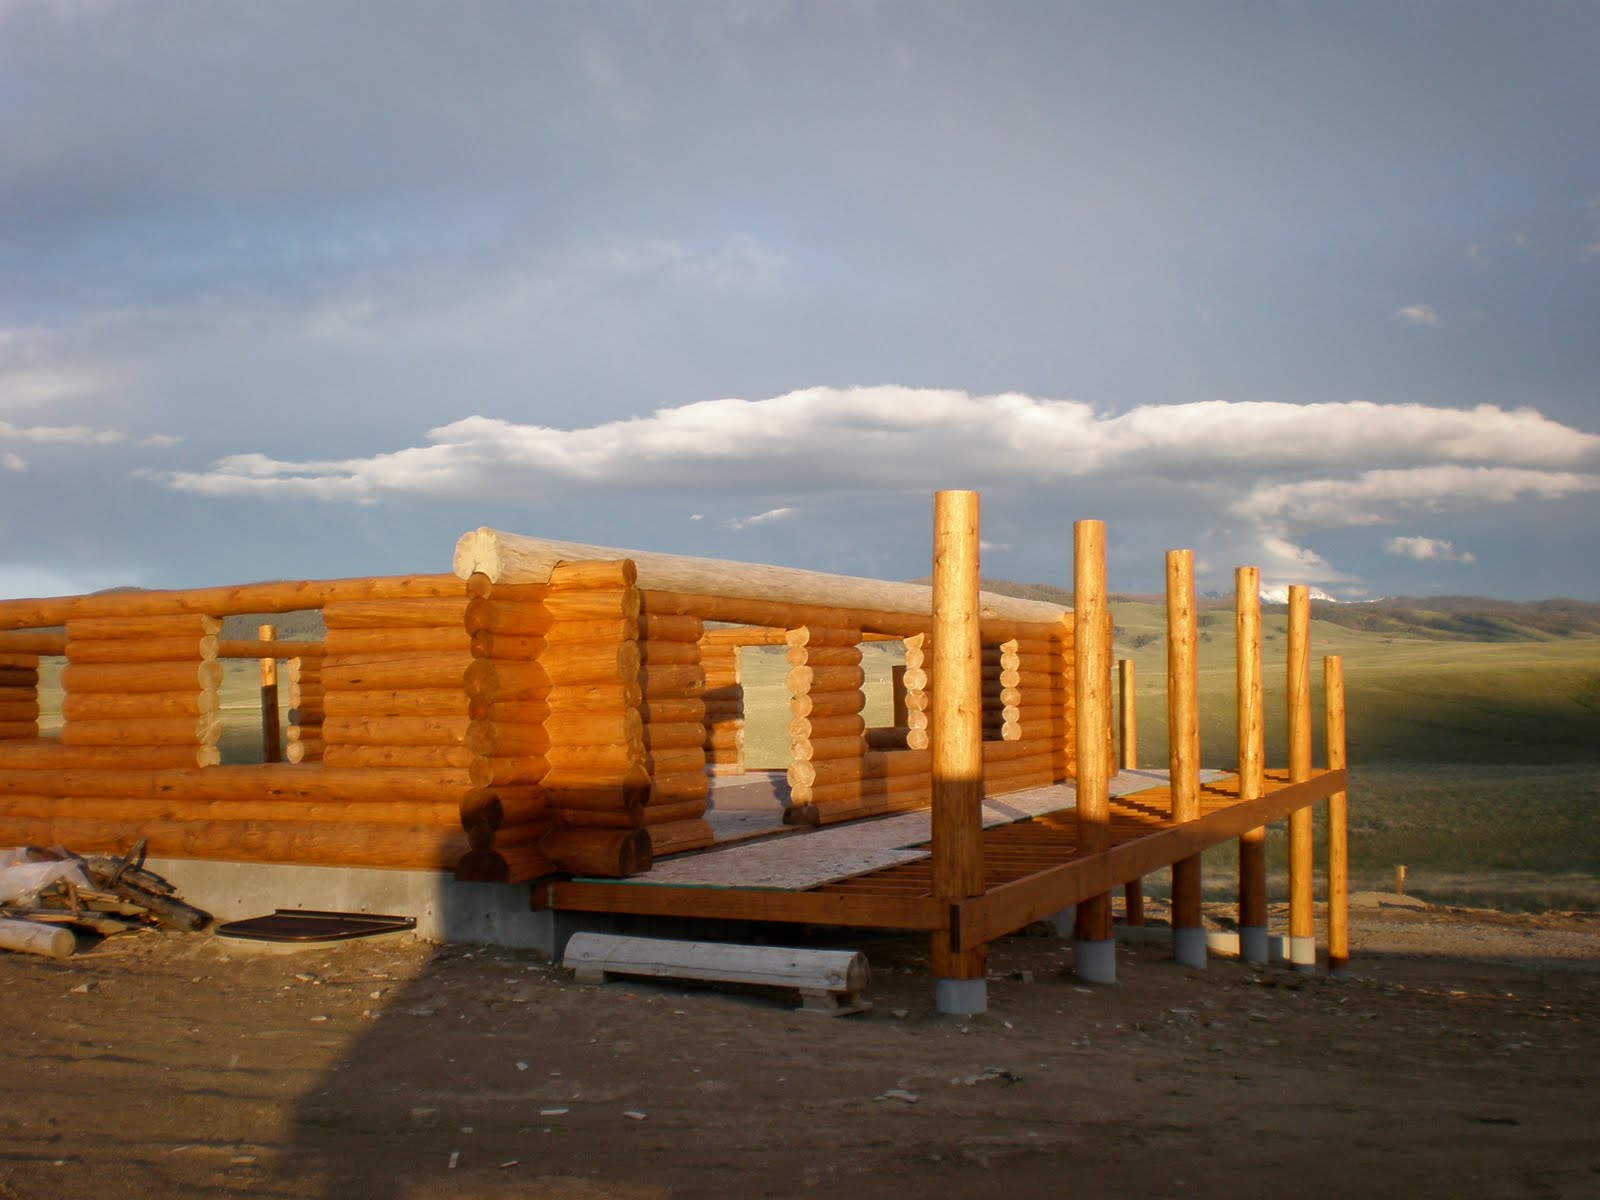

Monday, August 23, 2010

Finished framing end gables, Aug 23, 2010

Today I finished framing in the end gables. Tomorrow and possibly Wednesday, I will be helping shingle a roof in Butte for my cousin. When we finish, I'll take one of his people to run the lift and sheet the end gables and cover the sheeting with Tyvex.
After the gables are sheeted the next step is to cut the windows and doors on the main floor to their final size and frame them in. I may just install one door on the main floor, and sheet over the other doors and windows for the winter.

Saturday, August 21, 2010

Framing 75% complete, Aug 21, 2010

As of today I have completed 75% of the framing on the end gables. You see the north end here completed. On the south side the half over the loft is also completed. I have to set up the scaffolding on the main floor to finish the south end. I need a second person to run the lift to sheet the gable ends. I will be trading some work with my cousin to get someone to help.
The wind was blowing so hard today from the south that my cap kept blowing off my head. Tony was staining the ridgepole and had to stop because of the wind.

Thursday, August 19, 2010

Framing end gables, Aug 19, 2010

Today I started framing in the end gables. I was looking for someone with experience to help me with this, but it turns out I am experienced! What you see completed here took me 13 hours. I think I can complete the framing on both ends by Saturday. The end over the family room will be a little tricky. It's close to 30 feet above the floor. When the framing is completed, I will sheet both ends with OSB and cover them with Tyvek. (A plastic sheeting that protects the OSB)
Yesterday I also installed the last two beams in the basement. They support the logs that run from the main floor all the way to the roof system.

Wednesday, August 18, 2010

Finished shingling, Aug 18, 2010

Yesterday I had to purchase a roofing nailer and a 100 foot air hose to finish shingling the roof. I made it to within 3 feet of the peak yesterday before the shingles became too hot to walk on safely. Today I finished shingling the house. I am now looking for someone to help me frame out the end gables.

Framing the end gables requires two people as we will do a lot of it using the lift.

Saturday, August 14, 2010


Today we finished shingling the east side of the house. The west side is now about 50% completed. It will take about 4 more hours to finish the shingling completely. Tony was staining the interior logs today. He finished the main beam and all the loft logs on the main floor. I'm having problems with my roofing crew so I may end up completing the roof by myself.


When I planned the garage slab, I did not remember that the sill logs should be at least 18" above ground level to protect the logs from water splashing and causing decay. Yesterday we poured a 20" wall around the garage, leaving the openings for the two garage doors and the side access door. I have 14 logs peeled for the garage right now, but I will not start putting the logs on the wall until next year.

Wednesday, August 11, 2010

Shingling has begun on both sides, Aug 11, 2010


All facia and drip edge has been installed. We were rained out again today at 3:00 PM. It feels like Florida where it would rain every afternoon.


Here is the east side of the house. The facia and drip edges are completed on the dormers, and the entire roof is dried in. We started shingling on this side this afternoon. The plan for the next two days is to complete the shingling on the entire roof. The next step is to frame in the end gables.
Once the end gables are framed in, we can install the soffits on both ends of the house and over the deck on both sides.

Tuesday, August 10, 2010

Started Shingling, Aug 6, 2010

Last week we started shingling the west side of the roof. We still have several pieces of facia to install on the dormers, which will be completed tomorrow morning, the 11th. (I took a few days off) After these are on we can felt the dormers and install the drip edge.

The east side of the house now has felt installed up to the bottom of the dormers. All valley metal has been installed where the deck roof meets the upper roof on both sides, and above the dormers. Once the felt is installed on the east side to the peak, we can install the rest of the drip edge and begin shingling.

My plan is to have the roof completely shingled by the end of this week so we can begin framing in the end gables next week.

Wednesday, August 4, 2010

Installing facia, Aug 4, 2010

Today we started installing the facia on the west side and the north side. We also ran the first strip of weather guard on the roof. It has been a bad week to date. We have been rained out two days in a row in the afternoon, and Monday was a late start due to previous commitments my roofer had to take care of.
Tomorrow we should be able to start shingling the roof. Installing the facia is taking a lot longer than I thought it would. We also have to install facia on all three dormer roofs.

Tuesday, August 3, 2010

Finished dormers, Aug 3, 2010


Saturday we stained all the cedar for the facia around the perimeter of the roof (1" X 12"), and finished staining all the logs on the outside of the house with the exception of the ends top wall logs, the purlins and the ridgepole.
On Sunday, my cousin Jim and I trimmed the top wall logs, purlins and ridgepole to length (flush with the outer TGIs) and stained the ends.
Today I picked up the cedar boards for the dormer roofs (1" X 8") and stained all of them. We also picked up the drip edge today. The drip edge is a dark green. Tomorrow we will cut the edges of the roof sheeting flush and install nailers on the end TGIs for the facia, begin installing facia and drip edge.

Thursday, July 29, 2010

Roof sheeting complete, July 29, 2010

Today we finished the tails over the deck on the east side. The sheeting on the entire roof is now complete.
We started building the dormers today. We have the framework in place. Tomorrow we will build a roof on each dormer, sheet the three roofs, then sheet the dormer exterior walls. Once the dormer walls are sheeted, we will wrap them with Tyvek.
The next step is to install the cedar facia, (Which was finally delivered today) install the valley tin where the house roof meeting the deck roof, install the drip edge, install the felt and weather guard, then get ready to shingle.

Wednesday, July 28, 2010

Sheeting close to completion, July 28, 2010


Today we finished sheeting the west side of the roof. We cut the tails of the rafters/TGIs plumb over the deck and faced it with another TGI. The pitch of the roof is 9 X 12 so it is very hard to climb it with sheets of OSB ( 5/8" sheeting) in our hands. Below is the east side.


This is the east side of the roof. We have one strip about 36 inches wide left at the top. We cut the strips today, but the rains forced us to pack up about 4:00 PM. We sheeted over the dormer holes and then cut the openings to size. The forecast for the rest of the week is no rain.
Tomorrow we will install the last strip of sheeting at the top, chalk line the tails over the deck, cut them plumb and face this side with TGIs. Then we can install the last strip at the bottom. We will then begin building the dormers and installing the facia all around the house. We will be using 1 X 12 cedar boards, then 1 X 4 cedar boards at the top to give it a nicer look.
Once we get the facia completely installed, we need to trim all roof sheeting flush with the outside of the 1 X 4s, and install the drip edge around the entire roof. (We need to stain the cedar boards before we install the drip edge.)

Monday, July 26, 2010

The sheeting has begun, July 26, 2010

Today we installed the rest of the rafters/joists on the roof and started sheeting. Tomorrow we will cut the tails on the deck and install the facia, then finish sheeting this side. We will then go to the other side and do the same thing. We still have to frame out the dormers and get ready to shingle the roof. Standing on the top of the sheeting you see here, near the top of the roof, it is a long way to the main floor in the family room.
Once we get all the roof sheeting completed, we will remove all bracing from the roof system in the loft area.


Friday, July 23, 2010

Rafters close to completion, July 22, 2010


We have nine short rafters left to install, then frame in the dormers and we will be ready to sheet the roof. The plan is to have the roof shingled and start framing the gable ends next week.

Tuesday, July 20, 2010

The roof begins, July 20, 2010

Today we began installing the TGIs on the roof. We had to set up jigs to cut all the angles on the roof TGIs and the deck TGIs. The deck TGIs were left long so we can run a chalk line to mark and cut them all to the same length. Tomorrow we will finish the right side and begin the left side. The left side will have three five foot dormers so it will take somewhat longer to set up and complete. When the TGIs and dormers are complete, we will begin sheeting them with OSB.
Tony showed up again today to stain the exterior logs. He finished the right side on Saturday, and the left side today.
I also got up close and personal with a trim saw today. My thumb should heal fully in a week or so. Not such good news for the glove I was wearing.

Thursday, July 15, 2010

Log work completed, July 15, 2010


Today we finished all the log work on the house. We will begin installing the roof on Monday. I ordered all the material today to be delivered early Monday morning. I also talked to the stove people to see what we needed for roof attachments for the wood stove. They will be out as soon as we get the rafters installed to take measurements and tell us what we need for installing the pipes to code.

Below, you can see the last support logs installed on the main floor. The log by the family room is a very heavy log. We chose it to match the size of the log above it in the loft.

Tomorrow, I will finish installing the last loft floor board, which needs to be scribed in and cut. I will then begin staining logs. I have a guy, Tony, who stained the logs last year coming on Saturday. He does an amazing job with stain and caulking. We also chose the siding to be installed on both gable ends, the dormers and the basement outside wall.

Wednesday, July 14, 2010

First Deck log completed, July 14, 2010

Today we flattened the top two side logs and installed the first of two deck logs that will be scribed in and set on top of the tall deck poles. These two deck logs will support the roof over the deck on the sides of the house. They will have a 5 - 12 pitch, the roof is a 9 - 12 pitch.
Tomorrow we will install the deck log on the other side of the house and install the last two vertical support logs on the main floor. I have to install two more 6 X 6's in the basement as soon as the roof is on the house. These finish the support for the purlins right down to the basement floor. We poured an extra pad of cement under the basement floor to support these better. After tomorrow, I will be ready to install the roof and shingles, and frame in the dormers and end gables.

Sunday, July 11, 2010

Roof System Installation, July 11, 2010

Today, we installed the roof system. I rented a crane from the company my cousin Ron works for. Ron ran the crane for us. It took about 4 hours to set the posts and install the ridgepole and purlins. The next job is to cut flats on the walls to accept the rafters (TGIs). Then we will install the 1 X 4 boards on the ridgepole, purlins and top, side, wall logs. These will be spacers to install the inside tongue and groove roof boards after we insulate and install the electrical wiring. After the roof TGIs are installed and the roof is decked over with plywood or OSB, we will install the logs over the deck poles and tie the deck roof into the main roof on both sides of the house. Then we will install the felt and shingles.

Wednesday, July 7, 2010

Installing loft floor, July 7, 2010

Yesterday we started installing the loft floor. It is about 1,080 square feet of tongue and groove 2 X 6's. Today we finished all but the last 4 boards. We ran out of material, We will pick up what we need to finish in the morning. We also built all the parts for the roof system the last few days. Tomorrow we will finish the rest of the parts, plan out the height of every pole, and drill the holes in the posts and the top logs for the 3/4" rebar. This is my nephew Steve, worn out after building the floor.

Sunday, July 4, 2010

July 4th, a day off!

Today, my nephew Steve and I took a day off and went fishing up in the mountains above Wisdom, Montana. We went with my cousin Jim Hendrickson, and a friend, Jerry Phillips. Steve caught his first trout. It was a great ride to get to the lake on 4 wheelers and a dirt bike. We brought home 16 trout, and did a catch and release on a few others. Fish can be very slippery!

Wall logs completed, July 2, 2010

Friday we completed the wall logs. The final count was 15 and one half rounds. The longs walls are now 12 feet high. The floor of the loft is about 9 feet above the main floor.
The end logs have been flattened on top to accept the uprights that hold the ridgepole and the purlins, and to give us flat surfaces to frame in the gables. I also flattened two sides of the ridgepole on Saturday. This allows the TGI's (rafters) to be secured in a uniform manner. Monday we will flatten one side of each purlin, and one side of each deck log. The deck logs rest on the top of the tallest deck posts and will support the roof over the deck. We will then prepare the uprights that will be placed on the end walls to support the ridgepole and the two purlins on both ends. There will also be uprights in the center of the ridgepole and each purlin. These will be supported by other uprights right down to the basement floor.
The plan is to have all the roof system parts completed by this coming wednesday and get a crane in on Friday to lift everything into place. At this point, the log work for the house will be complete, and I can begin installing the roof, the soffits, and frame in the end gables.
The plan is to install three dormers on the roof. One dormer will be in each upstairs bedroom, and one will be in the open area between the two bedrooms. This may end up as a bathroom in the loft at some point.
I also plan to install the loft subfloor this week to give us a working platform when we install the roof system.

Thursday, July 1, 2010

14th round completed, July 1, 2010

Today we finished round 14. The next round is partially completed. We were rained out in late afternoon for the last two days. There will be 16 total rounds on the walls, then we begin to install the roof system, which includes cutting the tall deck posts to length and installing a log across them to support the roof sections over the deck on both sides of the house. The combined weight of all the logs on the walls is compressing the lower logs to the point that some of them have absolutely no gap between them. I love it when a plan comes together!

Tuesday, June 29, 2010

Half of 14th round completed, June 29, 2010

Here is my nephew, Steve Anderson, in front of the house with 13 and 1/2 rounds installed. We had the last two logs for the 14th round just about ready to put on the wall today when we were rained out. Tomorrow we have to move cattle, so we will not get back to the round until Thursday. We also installed the commode in the basement and plumbed it in. Modern conveniences!

Monday, June 28, 2010

Round 13 completed, June 28, 2010

Today we completed round 13. The first thing this morning I blew a hydraulic line on the lift. It was inside the boom. I called my cousin to see who I could get to fix it; It turned out I was the repairman! I had two new lines made (30.5 feet each) and installed them with the help of my nephew, Steve. We lost 3 hours as a result. We set, scribed, and sawed two logs today, and placed them on the walls. Tomorrow, we have to cut grooves in them to accept the ends of the loft planks. Then we will begin installing round 14. We also purchased everything we need to install the bathroom stool in the basement. We cut off the pipe below floor level and glued on the adapter that will hold the stool to the floor. Tomorrow we will finish the installation.

Wednesday, June 23, 2010

Loft logs installed. June 23, 2010

Here are the loft logs completely installed. We peeled them all, slabbed all the sides flat to accept the loft floor, and installed them all in two days. Tomorrow we will install the two logs (cap logs) that will go over the tops of the two end logs, and the nine loft logs you see on the top photo on the left side, and the two end logs and five long loft log ends on the other side of the house. The photo below shows a view of the loft logs from high in the air. The open space on the top right is the family/great room, which will be open to the ceiling.
Once we complete the cap logs described above, we will then install three more rounds of logs. When these are completed, we will begin the post and pole roof system. We will also cut the ten highest deck posts to a height that matches what we end up with on the side walls. We will cut a flat on one side of each log and scribe it to fit the top of the highest deck posts. It will then accept both sides of the roof system.

Friday, June 18, 2010

12th round completed, June 18, 2010

Today we finished the 12th round of logs. As you can see from this view, this round capped the ends of the loft log beam. Next we will install the loft logs.

Thursday, June 17, 2010

Loft main beam and support posts, June 17, 2010

Today we finished installing the loft log main beam and the three support posts. The 5 long loft logs and 5 short loft logs will be supported by this beam on 4 foot centers. The support posts shown are placed directly over the glue laminated main beam in the basement. The support posts are also directly over the three 6 inch by 6 inch posts that support the glue lam beam. Tomorrow will be spent installing cap logs on both end walls of the house, then stripping the cap logs for the sides that will be installed after all of the loft logs have been fitted. It gets to look more and more like a house every day.

Tuesday, June 15, 2010

11th round completed. June 14, 2010

The 11th round is completed. The next round, round 12, will include the main beam across the center of the house with three vertical support posts. The beam will run down the center of the building. Round 13 will include 5 - 38 ft loft logs going from the east side wall to the west side wall, plus 5 - 19 ft loft logs that will span from the east side wall to the main beam described above. This will be the foundation for the 3/4 loft. One problem I have now is finding suitable logs for loft logs. All the loft logs will be flattened on one side to accept the 2 X 8 floor boards.

Monday, June 7, 2010

First log installed in 2010, June 7

I'm Back! The first two weeks in Montana 2010 were filled with rain, rain and more rain. It finally cleared up somewhat so I could get my forklift and all my tools back on site. Today I peeled and installed (between light rain showers) my first log for 2010. These are larger logs as I want more log to work with when I start installing the loft logs. Peeling this log after a winter off was an experience. I know they will get easier as I get tougher.

Tuesday, April 13, 2010

Montana 2010 - Apr 13, 2010

In 6 weeks I will be back in Montana to complete the Log House I started in 2009. I am looking forward to the next phase of the building process. I will be installing one more round of logs, then I will begin installing the loft logs and the upright supports on the main floor of the house. I will try to find some logs that have character for these upright positions, as they will be visible after the building is complete. I had my cousin, Jim Hendrickson check the building out several times during the past winter and it sounds like everything is doing very well. A client of Jim's looked at our basement plan a month ago and liked it so well, Jim built an exact duplicate for them, right down to the retaining walls, for their home in Ramsey, MT.